Clojure と Leiningen と時々 Container 〜そしてデプロイへ〜

この記事は Clojure Advent Calendar 2016 の19日目の記事です。
Clojure を一度も使ったことが無かったのですが、少しは触ってみようと思い、今回 Clojure Advent Calendar 2016 に参加させてもらいました。
書くにあたり、凝ったことなんて全くできるはずもないので、自分らしい記事を書こうと思います。プログラミングには熟れており、これから初めて Clojure 触ってみる人の足がかりになるような記事になればと思います。
環境整備〜開発
とにかく、開発するなら Clojure を実行できなければダメだろうということで、Docker コンテナのイメージを使って楽に環境整備することに決めました。
Docker container

ここにあるコンテナイメージを pull して使用します。
$ docker pull clojure
タグでよく使うのは Description に記載されている通りすかね。
- latest, lein-2.7.1
- onbuild, lein-2.7.1-onbuild
- alpine, lein-2.7.1-alpine
- alpine-onbuild, lein-2.7.1-alpine-onbuild
コンテナイメージで不要なものが削減されたものを使用したければ alpine タグのを、実行するイメージなら onbuild タグのものを使用します。
まずは実行してみたいので、何も考えずに latest で取得して実行します。
$ docker pull clojure:latest
$ docke run -it -v ~/.clojure:/data-share clojure /bin/bash
これでインタラクティシェルでアタッチします。
Leiningen
アタッチしても Clojure の動かし方がわからなかったのですが、 /usr/local/bin に謎の lein というコマンドがあるので、「こいつが肝なんだろうな」とピンときました。
$ lein -h | head -n1
Leiningen is a tool for working with Clojure projects.
調べてみたところ、本当に色々やってくれるやつらしいので、こいつに乗っかることにします。

< Clojure はワシが育てた。
さて、作業ディレクトリですが、私は Docker 起動時に /data-share というディレクトリをマウントしているので、そこで作業するとします。
まず、 lein new app でアプリケーションの雛形を作成します。
$ cd /data-share
$ lein new app hello-world
次に、 lein run で実行します。 勝手に色々とやってくれるので便利ですね。
$ cd hello-world
$ lein run
Retrieving org/clojure/clojure/1.8.0/clojure-1.8.0.pom from central
Retrieving org/sonatype/oss/oss-parent/7/oss-parent-7.pom from central
Retrieving org/clojure/tools.nrepl/0.2.12/tools.nrepl-0.2.12.pom from central
Retrieving org/clojure/pom.contrib/0.1.2/pom.contrib-0.1.2.pom from central
Retrieving clojure-complete/clojure-complete/0.2.4/clojure-complete-0.2.4.pom from clojars
Retrieving org/clojure/tools.nrepl/0.2.12/tools.nrepl-0.2.12.jar from central
Retrieving org/clojure/clojure/1.8.0/clojure-1.8.0.jar from central
Retrieving clojure-complete/clojure-complete/0.2.4/clojure-complete-0.2.4.jar from clojars
Hello, World!
もう Hello world 出ちゃいました。
REPL
Clojure でなく、 Leiningen でも REPL が起動できるんですね。なんかすごい。
$ lein repl
nREPL server started on port 59269 on host 127.0.0.1 - nrepl://127.0.0.1:59269
REPL-y 0.3.7, nREPL 0.2.12
Clojure 1.8.0
OpenJDK 64-Bit Server VM 1.8.0_111-8u111-b14-2~bpo8+1-b14
    Docs: (doc function-name-here)
          (find-doc "part-of-name-here")
  Source: (source function-name-here)
 Javadoc: (javadoc java-object-or-class-here)
    Exit: Control+D or (exit) or (quit)
 Results: Stored in vars *1, *2, *3, an exception in *e

hello-world.core=> (-main)
Hello, World!
nil
完璧じゃないっすか…!と、いうことで、ここで終わりにしたいと思ったのですが、Clojure 使いの人から…

・
・
・

・
・
・
Webアプリケーション を デプロイ とな。笑止。
duct on GKE
duct については紹介してもらった Qiita の記事を、GKE については自分の記事を参考にしています。
duct
Leiningen にテンプレートがあるので、そちらから作成します。
+example は example というエンドポイントをリソースとして用意してくれるようです。
$ lein new duct myduct +example +cljs
ローカルの設定ファイルを生成するために、セットアップを行います。
$ lein setup
次に、サーバーを起動するために REPL を起動します。Clojure の REPL 文化は素晴らしいですね。
$ lein repl
nREPL server started on port 53589 on host 127.0.0.1 - nrepl://127.0.0.1:53589
REPL-y 0.3.7, nREPL 0.2.12
Clojure 1.8.0
OpenJDK 64-Bit Server VM 1.8.0_111-8u111-b14-2~bpo8+1-b14
    Docs: (doc function-name-here)
          (find-doc "part-of-name-here")
  Source: (source function-name-here)
 Javadoc: (javadoc java-object-or-class-here)
    Exit: Control+D or (exit) or (quit)
 Results: Stored in vars *1, *2, *3, an exception in *e

user=> (dev)
:loaded
dev=> (go)
2016-12-18 01:59:12.911:INFO::nREPL-worker-0: Logging initialized @14796ms
Compiling "target/figwheel/myduct/public/js/main.js" from ["src" "dev"]...
Successfully compiled "target/figwheel/myduct/public/js/main.js" in 12.965 seconds.
notifying browser that file changed:  target/figwheel/myduct/public/js/goog/deps.js
notifying browser that file changed:  target/figwheel/myduct/public/js/cljs_deps.js
notifying browser that file changed:  out/cljs/user.js
:started
dev=>
参考:Getting Started · duct-framework/duct Wiki · GitHub
起動したら、 curl などで叩いてみましょう。ポートは3000番で起動しています。
# execute command from outside.
# $ docker exec -it [Container Name] curl localhost:3000/example

$ curl localhost:3000/example
This is an example endpoint
REPL 上で (reset) すればリロードされるようです。 +cljs を付与しているので、 ClojureScript もここでコンパイルされるようです。(正直、よくわからない)
dev=> (reset)
:reloading (myduct.endpoint.example myduct.main myduct.endpoint.example-test cljs.stacktrace dev user)
:resumed
dev=>
エンドポイント追加
エンドポイントをひとつ追加してみます。
$ vim src/myduct/endpoint/hello.clj
ファイルの中身は example とほぼ同じですが、Hello 用にカスタマイズしました。
(ns myduct.endpoint.hello
  (:require [compojure.core :refer :all]))

(defn hello-endpoint [config]
  (context "/hello" []
    (GET "/" []
      "Hello, World!")))
次に、 system.edn ファイルにエンドポイントを定義します。
$ vim resources/myduct/system.edn
:endpoints で先ほどの Hello world を定義し、それを :app に登録します。
{:components
 {:app  #var duct.component.handler/handler-component
  :http #var ring.component.jetty/jetty-server}
 :endpoints
 {:example #var myduct.endpoint.example/example-endpoint
  :hello #var myduct.endpoint.hello/hello-endpoint}
 :dependencies
 {:http [:app]
  :app  [:example :hello]
  :example []}
ここまでできたら REPL でアプリを一度リセットします。
dev=> (reset)
:reloading (myduct.endpoint.hello)
Compiling "target/figwheel/myduct/public/js/main.js" from ["src" "dev"]...
Successfully compiled "target/figwheel/myduct/public/js/main.js" in 0.227 seconds.
:resumed
また curl などで /hello のパスを叩くと、Hello, World! が返却されると思います。
$ curl localhost:3000/hello
Hello, World!
duct をコンテナ化
ここまでできたらコンテナイメージとして作成し、Google Container Registry にプッシュします。
Dockerfile を duct プロジェクトのルートに置き、下記のように onbuild タグのコンテナイメージを使って docker build します。
FROM clojure:onbuild
# FROM clojure:alpine-onbuild
軽量にしたい場合は alpine-onbuild を使用してください。
# ビルド
$ docker build -t hello-duct .

# 実行
$ docker run -p 8080:3000 hello-duct

# 確認
$ curl -XGET localhost:8080/hello
Hello, World!
Google Container Registry にプッシュします。
# タグのエイリアス
$ docker tag hello-duct asia.gcr.io/[YOUR_PROJECT_ID]/hello-duct

# Registry にプッシュ
$ gcloud docker push asia.gcr.io/[YOUR_PROJECT_ID]/helloworld
ここまでできれば後は下記を参考にして GKE にデプロイすることが可能です。
ClojureScript is 何者?
「まじでわからん。」という状態だったのですが、下記のスライド読んだら大体把握できたのと、「すごくね?」という感情が生まれました。
GKE を使って golang アプリケーションコンテナを稼働させる

この記事は Google Cloud Platform(1) Advent Calendar 2016 の15日目の記事です。
普段は golang をやってるアプリケーションの人っぽい感じになっていますが、他にも色々とやっています。(と、いうアピールをたまにしておかないと) さて、今回は GKE + golang のデプロイ話でもしましょう。結局、golang が絡んでいますね。
準備
Docker をインストールしておき、使用できるようにしましょう。
コンテナイメージの作成・プッシュ

プロジェクト構成は下記のようにし、docker ビルドしたイメージを Container Registry にプッシュするようにします。
helloworld/
├── deployment.yaml
├── Dockerfile
├── main.go
└── service.yaml
main.go
アプリケーションコードはとてもシンプルに、8080番ポートで構えるサーバーを用意し、アクセスがあったときに "Hello world!" と表示するアプリケーションを用意します。
package main

import (
    "fmt"
    "log"
    "net/http"
)

func main() {
    http.HandleFunc("/", func(w http.ResponseWriter, r *http.Request) {
        fmt.Fprintf(w, "Hello world!")
    })

    log.Fatal(http.ListenAndServe(":8080", nil))
}
動作確認するには go run してビルド・起動し、 curl などで叩いてみてください。
# 実行
$ go run main.go

# 確認
$ curl -XGET localhost:8080
Hello world!
Dockerfile
golang をビルドするイメージが公開されているので、そのイメージを使用します。
FROM golang:1.7.4-onbuild
Docker ビルド・実行
main.go と Dockerfile が用意できたら実際にイメージをビルド・実行してみます。
# ビルド
$ docker build -t hello-container .

# 実行
$ docker run -p 8080:8080 hello-container

# 確認
$ curl -XGET localhost:8080
Hello world!
ビルドや実行で使用している hello-container はコンテナイメージへのタグです。
Container Registry にプッシュ
先ほど作成したコンテナイメージを Google Container Registry にプッシュします。先ほど作成したタグにエイリアスを張っておきます。
$ docker tag hello-container asia.gcr.io/[YOUR_PROJECT_ID]/helloworld
asia.gcr.io の部分はホスト先を指定することが可能です。
| Registry Host | Region |
|---|---|
| us.gcr.io | US |
| es.gcr.io | EU |
| asia.gcr.io | ASIA |
| gcr.io | US (unfixed) |
あと、わざわざエイリアスを張らずに、直接レジストリの命名でタグを作成しても大丈夫です。 Google Container Registry 用にエイリアス・タグを作成したらプッシュします。
$ gcloud docker push asia.gcr.io/[YOUR_PROJECT_ID]/helloworld
※ [YOUR_PROJECT_ID] は GCP の Project ID を指定するようにしてください。
ここまで作成できたらコンテナイメージ作成については完了です。
Container Engine クラスタの作成
デプロイ先となるクラスタの作成を行います。コンソールから作成もできますし、コマンドからも作成が可能です。 お試しで試してみるなら Cloud Shell をオススメします。

クラスタ作成
今回は gcloud コマンドから作成します。
$ gcloud container clusters create helloworld --zone asia-northeast1-c \
  --scopes cloud-platform \
  --num-nodes 2
scopes オプションはアプリケーションの必要に応じて datastore や bigquery のスコープも --scopes cloud-platform,datastore,bigquery のように増やしてください。

クラスタの認証
gcloud コマンドで認証を行うために、作成したクラスタの認証から行います。
$ gcloud container clusters get-credentials helloworld --zone asia-northeast1-c
Fetching cluster endpoint and auth data. kubeconfig entry generated for helloworld.
が出力されればOK。
クラスタの確認
問題なく作成されたか確認してみます。
$ kubectl cluster-info
Kubernetes master is running at https://xxx.xxx.xxx.xxx
GLBCDefaultBackend is running at https://xxx.xxx.xxx.xxx/api/v1/proxy/namespaces/kube-system/services/default-http-backend
Heapster is running at https://xxx.xxx.xxx.xxx/api/v1/proxy/namespaces/kube-system/services/heapster
KubeDNS is running at https://xxx.xxx.xxx.xxx/api/v1/proxy/namespaces/kube-system/services/kube-dns
kubernetes-dashboard is running at https://xxx.xxx.xxx.xxx/api/v1/proxy/namespaces/kube-system/services/kubernetes-dashboard
デプロイ
コンテナイメージ化されたアプリケーションをデプロイするためクラスタのレプリカセットとサービスの作成を行います。
Deployment
deployment.yaml という命名で下記のような Yaml ファイルを用意し、 kubectl コマンドを使用してレプリカセットを作成します。
apiVersion: extensions/v1beta1
kind: Deployment
metadata:
  name: helloworld
  labels:
    app: helloworld
spec:
  replicas: 3
  template:
    metadata:
      labels:
        app: helloworld
    spec:
      containers:
      - name: helloworld-app
        image: us.gcr.io/[YOUR_PROJECT_ID]/hello-golang:latest
        imagePullPolicy: Always
        ports:
        - name: http-server
          containerPort: 8080
continers.image には先ほどプッシュしたコンテナイメージの Registry Host を指定します。ここまでできたら kubectl コマンドを使用します。
$ kubectl create -f deployment.yaml
レプリカセットの進捗状況は下記で確認がとれます。
$ kubectl get deployments
NAME         DESIRED   CURRENT   UP-TO-DATE   AVAILABLE   AGE
helloworld   3         3         3            3           42m
Service
今度は service.yaml という命名で下記のような Yaml ファイルを用意します。サービスはレプリカセットと一緒に作成されたポッドにアクセスするための定義になります。
apiVersion: v1
kind: Service
metadata:
  name: helloworld
  labels:
    app: helloworld
spec:
  type: LoadBalancer
  ports:
  - port: 80
    targetPort: http-server
  selector:
    app: helloworld
$ kubectl create -f service.yaml
サービスの作成進捗は下記を叩くことでわかりますし、 LoadBalancer Ingress の IP が公開された IP アドレスとなるので、LoadBalancer 作成後、この IP にアクセスすることによって "Hello world!" が表示されるはずです。
$ kubectl describe service helloworld
Name:                   helloworld
Namespace:              default
Labels:                 app=helloworld
Selector:               app=helloworld
Type:                   LoadBalancer
IP:                     xxx.xxx.xxx.xxx
LoadBalancer Ingress:   xxx.xxx.xxx.xxx.
Port:                   <unset> 80/TCP
NodePort:               <unset> 31510/TCP
Endpoints:              xxx.xxx.xxx.xxx:8080,xxx.xxx.xxx.xxx:8080,xxx.xxx.xxx.xxx:8080
Session Affinity:       None
Events:
  FirstSeen     LastSeen        Count   From                    SubobjectPath   Type            Reason                 Message
  ---------     --------        -----   ----                    -------------   --------        ------                 -------
  43m           43m             1       {service-controller }                   Normal          CreatingLoadBalancer   Creating load balancer
  42m           42m             1       {service-controller }                   Normal          CreatedLoadBalancer    Created load balancer
動作検証
ここまでできたら、先ほどの LoadBalancer Ingress にある IP にアクセスして "Hello world!" が表示されることを確認してみましょう。
停止方法
クラスタを削除することによって、ポッドやロードバランサーもあわせて削除されます。超楽。
$ gcloud container clusters delete helloworld --zone asia-northeast1-c
The following clusters will be deleted.
 - [helloworld] in [asia-northeast1-c]
リソース
今年の写真 #TYPAC2016
この記事は 今年の写真 #TYPAC2016 Advent Calendar 2016 の14日目の記事です。
今年も去年と同じCanonの一眼レフのボディはEOS 6DでレンズはEF24-70mm F2.8L II USMで変わらずです。

Canon デジタル一眼レフカメラ EOS 6Dボディ EOS6D
- 出版社/メーカー: キヤノン
- 発売日: 2012/11/30
- メディア: Camera
- クリック: 8回
- この商品を含むブログ (10件) を見る

Canon 標準ズームレンズ EF24-70mm F2.8L II USM フルサイズ対応
- 出版社/メーカー: キヤノン
- 発売日: 2012/09/06
- メディア: Camera
- クリック: 3回
- この商品を含むブログを見る
新しい望遠レンズが欲しいと思いつつも、そこまでズームをしないので事足りているのですが、今以上のズームができたら世界が広がるんだろうなぁと思っています。

Canon 望遠ズームレンズ EF70-200mm F2.8L IS II USM フルサイズ対応
- 出版社/メーカー: キヤノン
- 発売日: 2010/03/19
- メディア: エレクトロニクス
- 購入: 1人 クリック: 16回
- この商品を含むブログ (19件) を見る
今年の写真
さて、今年の写真は自分が訪れた場所でチョイスしました。
- デンバー
- 鎌倉
- 尾道
の三地点となりました。
デンバー
デンバーで開催された Golang のカンファレンスの GopherCon に参加したときに撮影した写真です。北米の内陸部は土地が広大で、RTD(電車)に乗ってると緩やかな旅のように感じることができました。


鎌倉
鎌倉は瑞泉寺がオススメなので、是非行ってもらいたいです。


夜の段葛は趣があるので、昼に歩くときとはまた違った印象になると思います。


七里ガ浜高校近くの踏切。スラムダンクのオープニングです。

尾道
大林宣彦監督の尾道三部作や、月刊マガジンで連載されている「ぱすてる」の舞台で、いつかは行きたいと思っていたところでした。

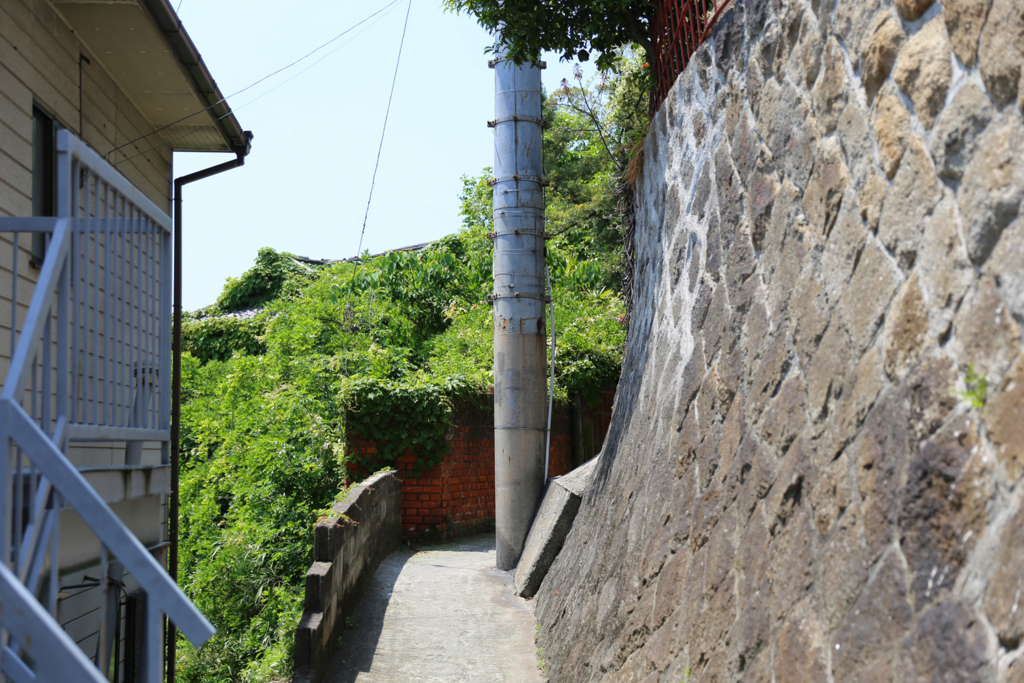
映画「ふたり」の電柱です。この場所、見つけ出すのに苦労しました。ちなみに、僕は28歳なので「ふたり」世代ではないです(笑)

ここは漫画「ぱすてる」で出てくる場所です。尾道を散策しているだけで、漫画に出てくる所がたくさんあるので読み込んでから行くと楽しいです。

海龍寺〜浄土寺山〜浄土寺山展望のルートです。浄土寺山からの見晴らしはとても素晴らしいですが、展望台に行くまで若干険しかった記憶が。


また来年
来年はもっと撮影しようかなと!
Vim をあまりカスタマイズしなくなった話

この記事は Vim Advent Calendar 2016 - Qiita の11日目の記事です。
社内ではVimハラスメントが横行していますが、私自身のVimは毎朝やる最新版ビルドを除いてカスタマイズすることがほぼ無くなりました。 元からハードにカスタマイズはしておらず、 ctrlp あれば十分だなという感じで、たまに .vimrc をいじるのは新しい言語を試すときにシンタックスのプラグインを導入するくらいです。
さて、そんなVimmerの私が「これだけおさえていれば充分」という基本機能を紹介します。
ちなみに、 ctrlp の記事を4年前の Vim Advent Calendar で書いています。
バッファ
Vimにはバッファという機能があり、開いたファイルをVim上で管理されています。バッファを確認するには :buffers か :ls コマンドを叩いて確認します。

バッファの表示について、詳しくは :h ls などでヘルプを確認すれば詳細はわかるかと思います。
このバッファで表示された際、添字として数字がついています。このバッファを開くためには :b [N] のように数字を指定することによって開くことができます。
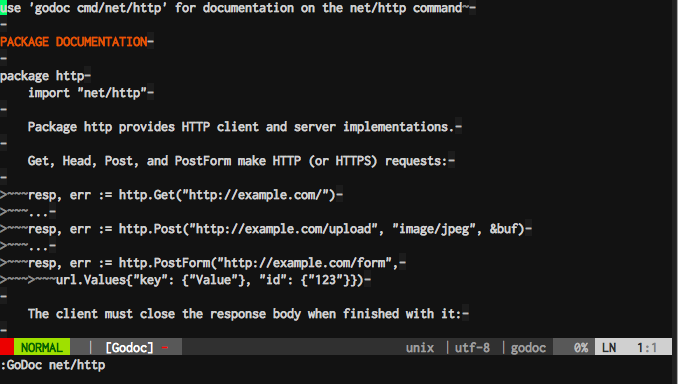
上にある画像を例にすると、 get.go というバッファを開くためには :b 1 とするか :b # とすることによって開きます。
タブ
タブもとても便利です。ただ、バッファを使いこなせばGUI用の上位互換でしかないのかなという印象にもなるので、バッファを使いこなすことがピュアな Vim を使うための大事な一歩だと思います。
GUI の Vim を使っている場合はタブをクリックすることにより、そのタブを開くことができるので、GUI用なのかなという気持ちもあります。
補完

Vimプラグインには強力な補完が存在していますが、私は補完をするときのロードによって起こる若干の引っかかりがとても気になるため、デフォルトのキーワード補完以外は使用していません。
ただ、オムニ補完はもっと使った方が良いなとは思っており、私は golang を主に実装するのですが、これから述べることにも書きますが、 GoDoc を開きながら実装することもしばしばあるので、そこは自身の課題として少し思っています。
が、キーワード補完便利過ぎる…(ふだん、他の補完を使用している人には機能として薄いと思われていると思いますが…)
Vim with golang

※これはカスタマイズしてる Vim
そもそも、ここまでシンプルに Vim を使うことになった理由は golang のシンプルさが関係している気がします。キーワード補完も、バッファに対象となるキーワードが存在することによって補完できるため、 GoDoc を用いながら実装をしています。
また、ほとんど golang の構文や関数を覚えているので、ぶっちゃけると GoDoc やシンタックスハイライトは目に見える情報としてなくても実装できる が正直なところとしてあります。
目に見える情報でコーディングするのも大事ですが(不具合を出さない点で)、環境を依らずに実装できるのも楽なのでオススメ(?)です。
おわりに
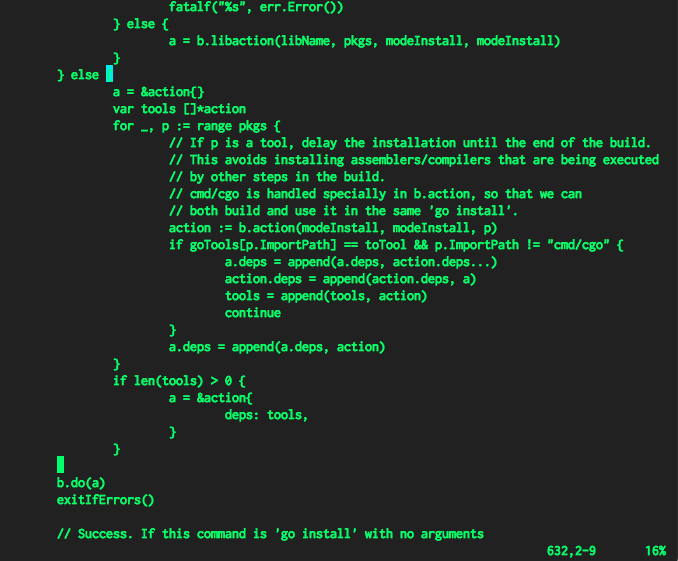
Vim をカスタマイズしなくとも golang は実装できるので、下記の画像にある状態でも実装を進めていたりします。

実装したあと、インデントに関しては gofmt -s -w get.go のようにしてフォーマッティングすれば良いため、あとは普通に実装が通るか否か、実装が間違えていないかの問題でしかありません。
普段、高級エディタに慣れている人も、たまにはプレインなエディタに戻ってみるのもアリだと思って Vim を触ってみましょう。
リソース
【Git】コミットメッセージのスペルチェック

この記事は Git Advent Calendar 2016 - Qiita の8日目の記事です。
スペルチェッカー - aspell
スペルチェックをするために aspell というスペルチェッカーを使用します。

インストール on macOS
macOS では Homebrew 🍺 を使ってインストールします。
# To install aspell
$ brew install aspell

# make sure that the aspell has been installed.
$ which aspell
/usr/local/bin/aspell
インストール on Debian
Debian しか使っていないものでして…
# To install apell
$ apt-get install aspell -y

# make sure that the aspell has been installed.
$ which aspell
/usr/bin/aspell
使い方
list コマンドを使用して、STDIN から文字列を流します。
# Test (Typo beautifl)
$ echo What a beautifl sky | aspell list
beautifl
上の例では beautiful をわざとタイポしています。
Git フック
どのタイミングで検証をするかはやはり Git フックで対応することになりますが、pre-commit などのクライアントサイドフック はよくあるので今回はサーバーサイドフックを使用します。
サーバーサイドフック
サーバーサイドフックスクリプトは知らない人は結構いる気がします。GitHub で特定のブランチのフォースプッシュを禁じる設定があると思いますが、あれはサーバーサイドフックが設定されているからです。
クライアントサイドフックの他に、いくつかのサーバーサイドフックを使うこともできます。これは、システム管理者がプロジェクトのポリシーを強制させるために使うものです。これらのスクリプトは、サーバへのプッシュの前後に実行されます。pre フックをゼロ以外の値で終了させると、プッシュを却下してエラーメッセージをクライアントに返すことができます。つまり、プッシュに関するポリシーをここで設定することができるということです。
サーバーサイドフックには下記の3種類存在しています。
- pre-receive
- post-receive
- update
pre-receive, post-receive フック
クライアントからのプッシュを処理するときに最初に実行されるスクリプトが pre-receive で、処理が終了した後に実行されるのが post- receiveです。スクリプトは、プッシュされた参照のリストを標準入力から受け取り、ゼロ以外の値で終了させるとプッシュが却下されます。post-receive フックについては処理の完了通知などに使うことができます。
update フック
update フックは pre-receive フックと似ていますが、pre-receive と違うのは複数のブランチへのプッシュがあったときにブランチ単位でそれぞれ一度ずつ実行されます。
スペルチェック方法
1. pre-receive
下記のスクリプトを .git/hooks/pre-receive に記述します。
#!/bin/sh

which aspell > /dev/null
if [ ! $? -eq 0 ] ; then
  exit 0
fi

while read oldrev newrev refname
do
  misspelled=`git log --format=%B -n 1 "$newrev" | aspell list`
  if [ -n "${misspelled}" ] ; then
    echo >&2 "Possible misspelled words in the commit message:"
    for e in $misspelled; do echo >&2 " - ${e}"; done
    exit 1
  fi
done
2. コミットメッセージ例
今回、下記のようなコミットメッセージを用意しました。beautiful をタイポしています。
$ git log
commit f4eb3de
Author: Shintaro Kaneko <kaneshin0120@gmail.com>
Date:   Thu Dec 8 14:03:37 2016 +0000

    Initial commit: What a beautifl sky
3. git push
下記のようにプッシュを行うと、メッセージとともにプッシュがリジェクトされます。
$ git push origin master
Counting objects: 1, done.
Writing objects: 100% (1/1), 190 bytes | 0 bytes/s, done.
Total 1 (delta 0), reused 0 (delta 0)
remote: Possible misspelled words in the commit message:
remote:  - beautifl
To /home/kaneshin/foo/rem
 ! [remote rejected] master -> master (pre-receive hook declined)
error: failed to push some refs to '/home/kaneshin/foo/rem'
おわりに
pre-commit とかでは個人の環境に依ってしまうので、サーバーサイドフックでカバーできるところは積極的にカバーしていきたいものです。